Deploying Cluster with $200 Free Credit
Be sure to deploy your cluster using the Rapid Channel if creating a Dedicated Cluster. A Serverless Cluster will automatically use the Rapid Channnel.
If you’ll be using your own StreamNative Pulsar cluster, you’ll need to make additional changes to the code throughout the course. This includes Kafka and Pulsar endpoints and OAuth2 settings.
Endpoints
Once you’ve spun up your cluster, you can obtain endpoints by navigating to Pulsar Clusters in the left pane of the StreamNative UI and selecting Details. You should see a section called Access Points.

You will be using all four endpoints during the course.
You’ll start by using Kafka Service URL (TCP) to produce and consume messages to the KSN Kafka protocol handler. When you need to access the Kafka schema registry, you will use Kafka Schema Registry URL (HTTPS).
If you decide to change the number of partitions of your topic, you will use HTTP Service URL (TLS) to access the Pulsar Admin endpoint. Broker Service URL (TLS) will be used by the Pulsar Java Client when producing and consuming messages to the Pulsar protocol handler.
OAuth2
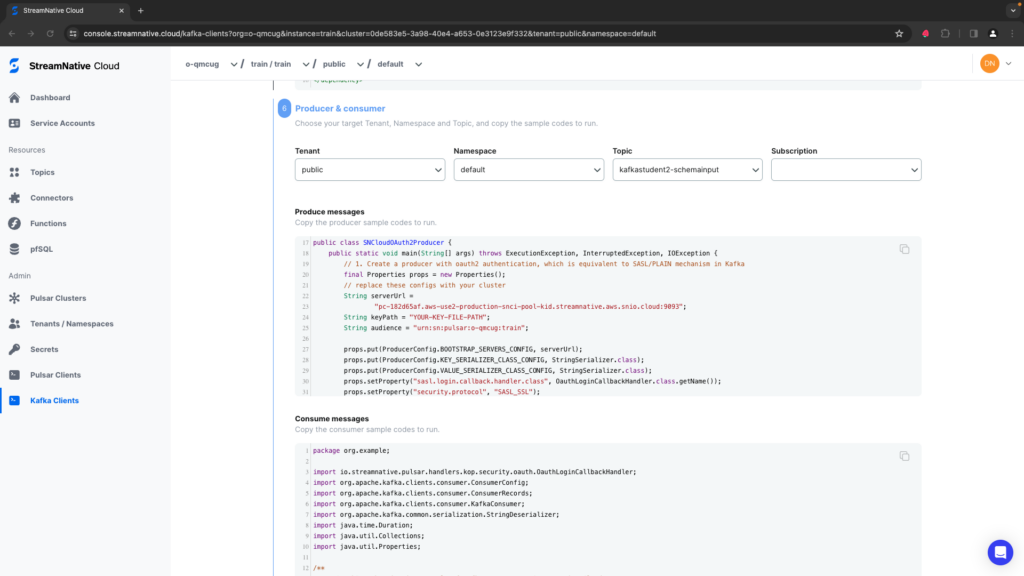
When configuring OAuth2 throughout the course, you will need to adjust the audience to correspond to your org and instance. The audience should include the name of your instance (this is one level above the cluster, in the above image you can see both the instance and cluster are train at the top of the page). For example, the course instance is called train in an org called o-qmcug. The audience is therefore:
urn:sn:pulsar:<org name>:<instance name>
urn:sn:pulsar:o-qmcug:train
You can also verify you have the correct audience by clicking on Kafka Clients in the left pane of the StreamNative UI. If you keep the default settings of Java Code libraries and click Next multiple times, you should be down to the Produce messages code where the audience for your cluster will be populated.